Friday, July 27, 2012

Branching out from sewing

My resolution this year was really to "craft" more, and I had a list of potential crafts that included making jewelry, crocheting, making artwork, etc. etc. But really I've stuck to sewing thus far, and it's kind of getting old (actually, I'm just embarrassed that my wardrobe is growing so fast, even if it is all homemade and cheaper). So I made something else! Or rather...almost made. Really I'm 95% done, but I'll have to wait to finish.

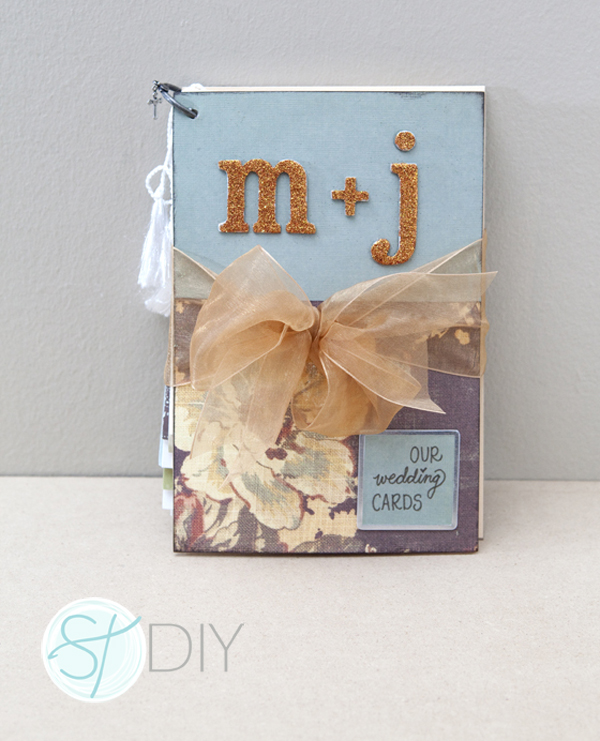
It's a....wedding card book! We had a Pinterest relief society activity, and my amazing neighbor brought a book she had made using their wedding cards. It was adorable, super easy, and scrap-booky- and I love and envy people with scrapbook skills. I found and followed this tutorial from Something Turquoise but just used what little scrapbook supplies I have for my book.


Tutorial from Something Turquoise. I especially love the initials

Even though it's not even really similar to the tutorial, I think mine turned out great! All I have left to do is punch holes in all the cards and the front/back covers, and put ribbon through (or a ring like the tutorial had) to tie them all together. Unfortunately I don't have a hole punch that will work :( but that might be my next purchase once I get a coupon! I am actually proud of my creativity here, which is strange because I usually think I have no scrapbook skills. It definitely helps to have a tutorial to get ideas from!

Front cover with our picture

Eventually these will all be bound together with ribbon!

It's so nice to finally have a place for all our cards

Oh...and just for fun, I thought I'd post the newest fabric I just got. It was on sale at Hobby Lobby, and I just had to get it because it matches my kitchen theme perfectly! Isn't it great? I can't wait to begin my next project!!


Tuesday, July 24, 2012

The. Best. Brownies. Yet.

Man, do I have luck with brownies or what! Maybe it's because I am usually making them for something (family dinners, new neighbors, etc.) so I am more careful with them than I am with cookies. I just tend to make flat, crispy cookies, whereas all of my brownies (really just the red velvet and rocky road brownies) have turned out well! So these were a spontaneous brownie decision, which may have been my best one yet.

It was about 8:30pm when we decided we wanted brownies. The only decision was: caramel or peanut butter? There is something you should know about me. I don't often have fun cooking things around. Yes I have chocolate chips (and butterscotch and white chocolate), but that's it. Want caramel? Make it from scratch. So....it was probably best that we settled on peanut butter. (but I have a feeling caramel will be in my near baking future, because I am dying to try to try making it!)

I have a problem making brownies from scratch because they always seem to contain like three cubes of butter. And since I promised myself earlier this year that I wouldn't skimp on ingredients anymore, I just stay clear of these 3-cube recipes so I'm not tempted to use shortening or cut back or something. These brownies were rated the best on All Recipes, and they used normal amounts of ingredients so it sounded great! They really were very very good (true, not as dense or fudge-y as other brownies I've had, but they were perfect with the peanut butter and chocolate frosting I used).

Easy from-scratch brownies from All Recipes

The recipe for the frostings came from this recipe from Making Life Delicious. Oh man, was this a good recipe choice. I didn't put peanuts in the brownie batter (lazy!) and I didn't have reeses, but they were still rich and moist and amazing! Since I only made an 8x8 pan of brownies, I halved the peanut butter and chocolate frosting recipes (hurray, less butter!) but then I did add extra powdered sugar and milk to make it spread a bit further and also be fluffier. Overall, seriously. amazing. We had company over yesterday, and everyone had seconds on the brownies! (Which is even better for us, because then I don't have leftovers in the freezer tempting me every second of every day.)

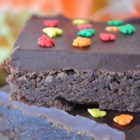
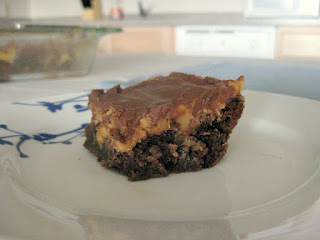
Wow. Just looking at this picture makes me want to make these again!

Lessons learned: just use what the recipe calls for, it's worth it! And, when in doubt, use a smaller pan and make them thicker. This really wasn't learned in this recipe- it was from earlier this week when I made chocolate chip cookie bars. The idea was simple- make cookie dough, spread in pan, bake and cut into bars! However, I didn't have the jelly roll size pan the recipe called for, so I opted for a full cookie sheet rather than a 9x13. Big mistake. Dry, hard cookie bars instead of delicious and easy treat. So sad! Those, unfortunately, are now in my freezer, not even really tempting me, unless we crumble them over ice cream. Lesson learned- if it's a treat, don't try to skimp!


Oh, another lesson learned: don't try to make frostings from chocolate chips (especially not semi-sweet). This frosting was absolutely perfect, and it was just regular old buttercream with cocoa in it. I'm doing it this way from now on!

Saturday, July 21, 2012

Ruffles ruffles ruffles!

I have a really hard and really fun time deciding what to make each month for my projects. On the one hand, I would love to make cute colorful purses, pillows, dresses, and every kind of accent for my home imaginable. On the other hand though, things get expensive! Especially if you want pretty fabric. So I tend to buy fabric on sale, and keep it forever until I find a project that actually works with it. Maybe when I get better at finding good deals on fabric I will make some projects that I'm dying to do! For now, we just have ruffles.
Project I want to do so bad once I save up for cute fabric!

So...don't ask why I bought muslin fabric. When I look at my store bought skirts, they all have super soft fabric. So when I go to the store (especially if I haven't researched the fabric I need for a specific project), I just walk around feeling the fabrics until I find something that seems close. And apparently muslin felt close. Little did I know that when I later researched muslin to see what I could do with it, it seems muslin is mostly used for making models of other fabrics! Oh dear...I bought myself under-fabric. Basically.

So the muslin sat in my closet for quite a few months, as it watched other fabrics be made into lovely skirts. Then, I came across this skirt from Alisa Burke. Oh. My. Ruffles! I'm not even sure why I thought this skirt could work for me. I don't really use petticoats...and I don't have adorable riding boots! But it's about the only skirt I could find that used muslin, and so I went for it.

Adorable Alisa Burke skirt

I am so so so glad I did go for it.  First of all, new skills! I love learning new sewing skills. This skirt taught me how to make ruffles and how to (kind of) serge the end of my fabric. Actually, that's a lie- it's not close to serging at all. But it works all the same for this skirt.

I can't believe how easy this skirt was. You see, it isn't meant to be perfect. In fact, the messier the better! All I did was cut front and back using a skirt I liked the shape of, then I cut ten strips for a ruffle. I had a hard time deciding how long to do my fabric so it would still be long enough when ruffled, so I did some research. Apparently 1.5-3x the length you want is a good place to start. But...like me (this always happens so I should probably have learned by now), I didn't have quite enough fabric to do that much, so I just made the strips as long as my fabric would let me (which I think ended up being almost 1.5x length). Luckily (fhew), it was perfect! I sewed along the top with the longest stitch length my machine had, then I pullled one end of the string to ruffle it. I think technically you are supposed to do one regular 'stabilizing' stitch, then another one to pull, but I was going for ease and care-free-ness.

This is what the top of the ruffles looks like. Frayed and crooked, but who cares!

So after ruffling 10 strips, I sewed them on by eyeballing it. I started with the bottom ruffle and made it line up with the bottom of the skirt, then just moved each one up and pinned. After that, it was just sewing the two sides together, adding a waistband at the top, and a zipper (oh yah...by "it was just" I clearly mean I had to take out and redo the zipper, just like always! But I think I am getting better... :D maybe...). Alisa Burke did an elastic waist on hers, but I plan to wear mine much more like a skirt, so I chose a zipper.

All the ruffles sewn on

Alisa Burke also didn't hem her ruffles at all. Which works- and I planned to do that too. However, after just trying it on for sizing, it was already unraveling too much for my liking, so I started researching how to finish the edges. There were some good options- actual folding and hemming the layers, using a fray checking product, zigzag stitching, or even clear nail polish! (which I actually almost tried). I decided to try zigzag stitching, but while looking through my machine instructions, I found another stitch that was called overcast stitching.

I actually didn't know at all what it was, but it looked and sounded right! So I tried it first on a small scrap, then went ahead and overcast stitched all my ruffles! And...it's perfect. Really. I like the look better than zigzag, and it keeps all the fraying in check. Hurray!

The overcast stitch. You can tell the fabric had already frayed quite a bit! 

I haven't worn it yet, but I already love it hanging there in my closet. It's crazy and not like anything else I have, but it's also a neutral so it's not too crazy, right? Yay for learning about overcasting and ruffles!

The final skirt. It goes up high on the waist to stay modest, and then the ruffles get crazy!
Wednesday, July 18, 2012

Maxi Dress

I don't go shopping....like hardly at all. I actually love looking at cute clothes, and I love seeing what's in style. However, I really (really really really) don't like spending money, plus I'm kind of in a DIY kick this year. Hence the blog, right? So most things lately that I want (skirts, dresses, jewelry eventually) I feel like I would rather make exactly what I want (and learn the skill of making my own things!) than spend money at a store.

That's where this maxi dress came from. I love the idea of maxi dresses- but I've never found ones I liked in my price range. So I had an old t-shirt with a hole in it right at my belly button where my jeans always rubbed against it, and I decided to go for it!

I am practically always looking at blogs or articles on new sewing techniques or tutorials, so I can't remember where I got all my inspiration for this dress. But I did follow this tutorial from Elle Apparel (one of my very favorite sewing blogs), just without the yoga waistband. However, I have quite a bit of grey jersey material left, so I will probably make a yoga skirt like hers too!

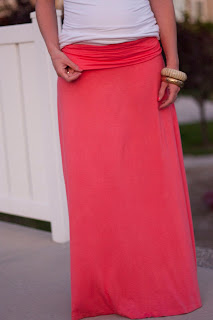
(Maxi skirt from Elle Apparel- it looks so soft and comfortable)

I don't have any picture from my actual process, but it was so very, very simple. I measured my length and cut two pieces for the skirt, and then two pieces for the waistband. For the waistband, I just measured so it would be the same width around as the bottom of the shirt I cut to use at the top. 

(This is a close up of the waistband)

After that it was just sewing! Really, super easy. The cool things I learned in this project were how to use a ballpoint needle and a zigzag stitch for sewing with jersey. I know I read articles on this, so I'm sorry I can't find them! I actually mostly followed the directions for sewing stretch fabrics that came with my sewing machine instructions. The zigzag stitch just makes the fabric able to stretch without straining the thread. 

(Full dress. I promise it looks better when I'm wearing it)

Really, sorry there isn't more to say about this dress. If I had to do it again (which I definitely will since it was so easy and the dress is the most comfortable thing I own), I would add pockets (I recently found an easy tutorial on another favorite blog, Sweet Verbena. Yay!) and I would do something more to embellish the waistband. This is nice and simple and comfortable, but it definitely does look homemade to me. So we'll see! Overall I am so glad to learn to sew with jersey, and just to feel more comfortable with my sewing machine in general.